21
Dec
Tutorial Alfresco Smartphone Ipad, Iphone, Android - iOS
Here
is a tutorial mobile Alfresco:
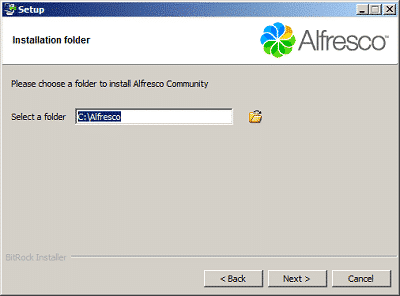
Ipad, Iphone, Android.
using the OS:
OS Android : iOS 6
Application : Alfresco 4.0e Community
----------------------------------------------------------
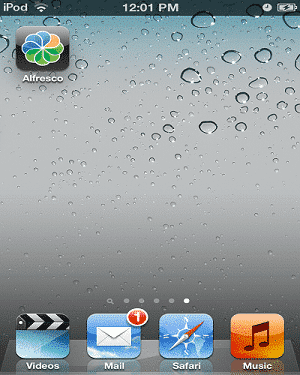
1. Install app Alfresco mobile : Ipad, Iphone, Android from the App Store. These icons display on mobile Ipad Alfresco:

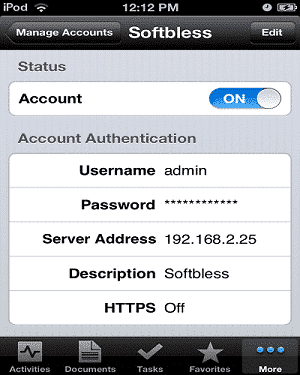
2. Open the Alfresco application, and then click More - Manage Account to login to the server Alfresco
![]()
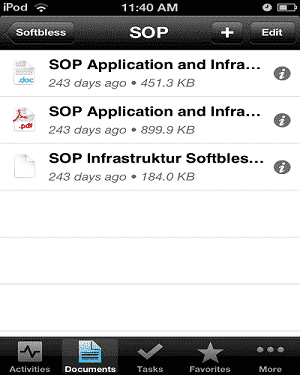
3. Then click Browse Documents
2. Create Folder
Click the + button on the upper right side, and then click Create Folder.
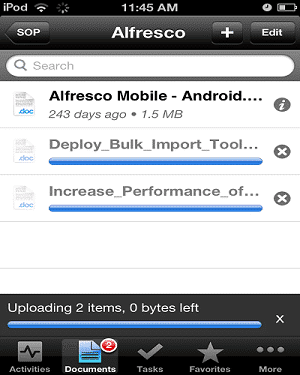
4. Download Document
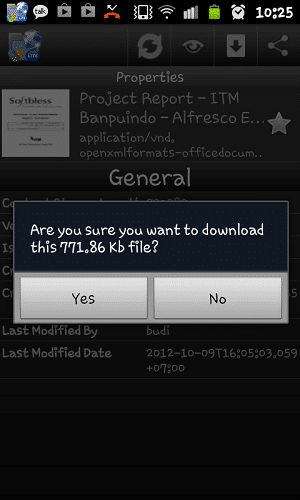
Click the document you want to download, then click the Action button at the bottom far left and click Download:
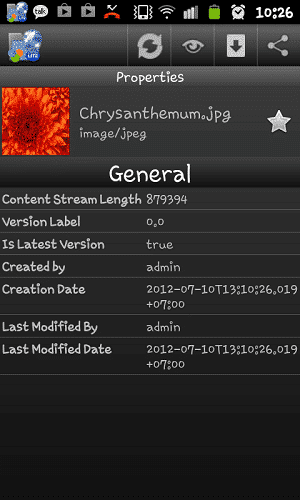
5. View Properties
Browse the document, then click the i button on the right side of the document. After clicking i will be shown properties of the document.
6. Update Document
Click the document you want to download, then click the Action button at the bottom of the left and then click Open in. Make sure there is an editor for editing documents on your iPhone or iPad:
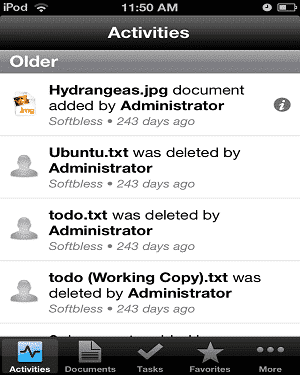
8. Activities
To view a user's activity, click the button on the toolbar below Avtivites
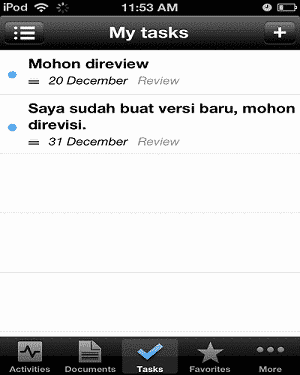
9. Task
To see the task you need to do, click the Tasks button on the toolbar below
A few mobile Alfresco tutorial: Ipad, Iphone, Android.
If there are any questions and difficulties please contact us.
using the OS:
OS Android : iOS 6
Application : Alfresco 4.0e Community
----------------------------------------------------------
1. Install app Alfresco mobile : Ipad, Iphone, Android from the App Store. These icons display on mobile Ipad Alfresco:
2. Open the Alfresco application, and then click More - Manage Account to login to the server Alfresco
Username : admin
Password : *****
Server Address : 192.168.2.25
Description : Softbless (content may be anything, just labeling only)
HTTPS : OFF
Port : 80
Service Document : [Default]
3. Then click Browse Documents
Features
1.
Browse
Document
After doing the Manage
Account, click on the Document
toolbar
button below to see the Alfresco
repository
2. Create Folder
Click the + button on the upper right side, and then click Create Folder.
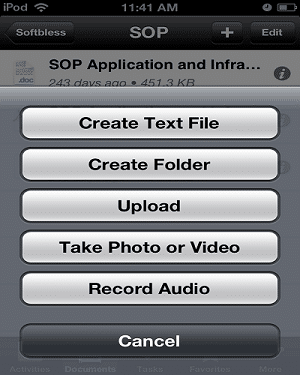
3.
Upload Document
Click the + button on the upper right side, then to click Upload.
Upload
mutilpe documents:
4. Download Document
Click the document you want to download, then click the Action button at the bottom far left and click Download:

5. View Properties
Browse the document, then click the i button on the right side of the document. After clicking i will be shown properties of the document.

6. Update Document
Click the document you want to download, then click the Action button at the bottom of the left and then click Open in. Make sure there is an editor for editing documents on your iPhone or iPad:

7.
Workflow
Click the document
you want to download,
then click the Action
button at the bottom of the left and then click Send for review.
Then fill in:
• Choose Assignee
• Due on
• Email notification ON

8. Activities
To view a user's activity, click the button on the toolbar below Avtivites
9. Task
To see the task you need to do, click the Tasks button on the toolbar below
A few mobile Alfresco tutorial: Ipad, Iphone, Android.
If there are any questions and difficulties please contact us.
14
Dec
Installing and Configuring Alfresco Desktop Sync
Server:
Linux Centos x64
Client: Windows 7
Application: Alfresco Community 4.0e
----------------------------------------------------------
1. Download Alfresco Sync desktop applications
2. Install Alfresco Sync desktop application
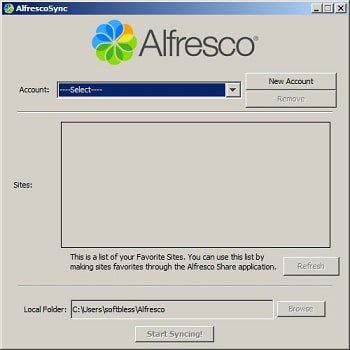
3. After Alfresco Sync desktop application installed, there will be AlfrescoSync icon on the desktop.
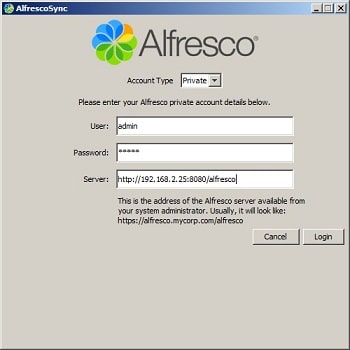
Double click the icon AlfrescoSync, it will appear like the picture below:
4. Create New Account. Adjust with existing accounts in Alfresco.
Role account will be the same as the one on the Alfresco.
If the account is in the Consumer Alfresco, the account is not in sync. Minimal role is Contributor.
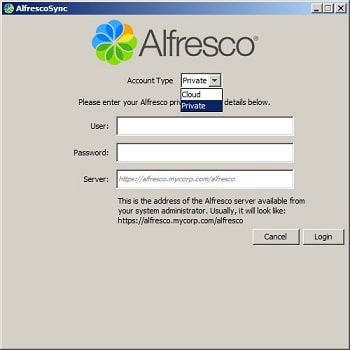
5. Select Private; enter a username, password, and URL Alfresco server.
Username and password in accordance with Alfresco.
Then click the Login
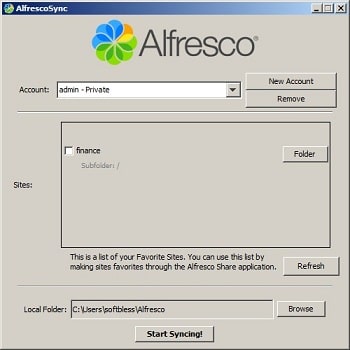
6. Make Sure the Alfresco already created a Site, such as Site Finance.
Then Finance Site will be sync with the Local Folder.
One account can also sync with 2 or more sites contained in Alfresco.
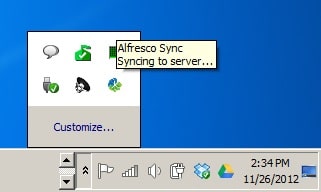
7. Icon AlfrescoSync also found in the System Tray
Client: Windows 7
Application: Alfresco Community 4.0e
----------------------------------------------------------
1. Download Alfresco Sync desktop applications
2. Install Alfresco Sync desktop application
3. After Alfresco Sync desktop application installed, there will be AlfrescoSync icon on the desktop.
Double click the icon AlfrescoSync, it will appear like the picture below:
4. Create New Account. Adjust with existing accounts in Alfresco.
Role account will be the same as the one on the Alfresco.
If the account is in the Consumer Alfresco, the account is not in sync. Minimal role is Contributor.
5. Select Private; enter a username, password, and URL Alfresco server.
Username and password in accordance with Alfresco.
Then click the Login
6. Make Sure the Alfresco already created a Site, such as Site Finance.
Then Finance Site will be sync with the Local Folder.
One account can also sync with 2 or more sites contained in Alfresco.
7. Icon AlfrescoSync also found in the System Tray
13
Dec
Alfresco Smartphone - Android
OS
Android : Gingerbread
----------------------------------------------------------
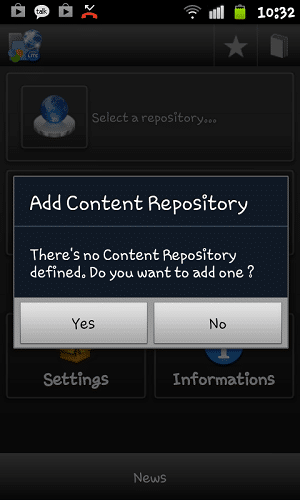
Install applications ACC - ALF Mobile
The first time you open the application ACC - ALF Mobile then you will see Add content repository.
Click Yes.
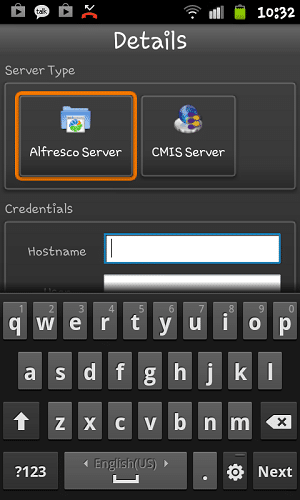
Select the type of server, select the Alfresco server by clicking the button Alfresco Server
Details:
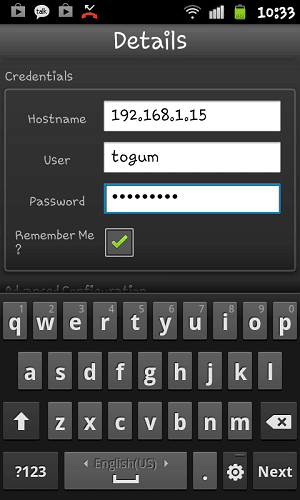
Credentials
Hostname: 192.168.1.15
User: togum
Password: ******
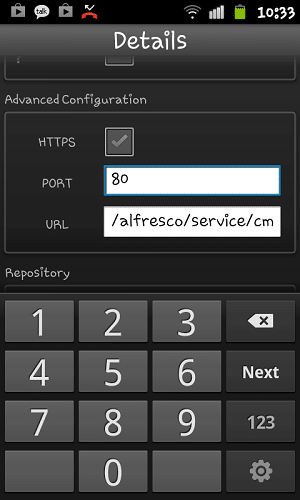
Advanced Configuration
HTTPS: not checked
Port: 80
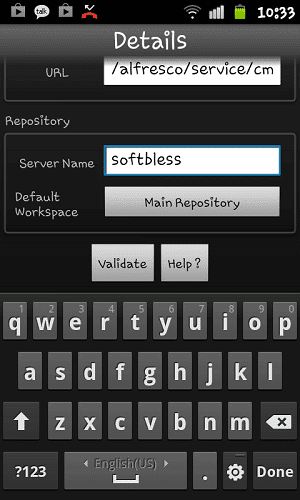
URL: /alfresco/service/cmis
Repository
Repository Name: Type anything - it's a personnal label/id for your server inside the application. Ex: softbless. "If it is not filled then be validated because of the content of the repository name to empty".
Workspace: Main Repository
Credentials
Advanced Configuration
Repository
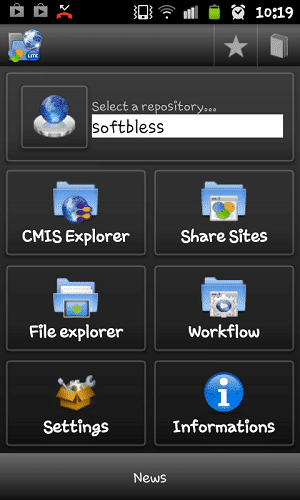
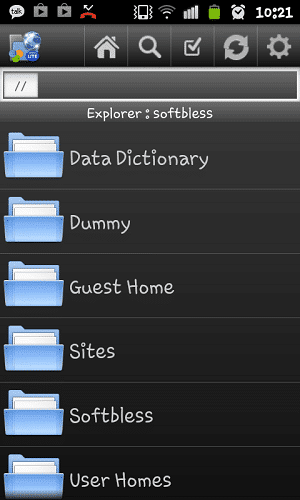
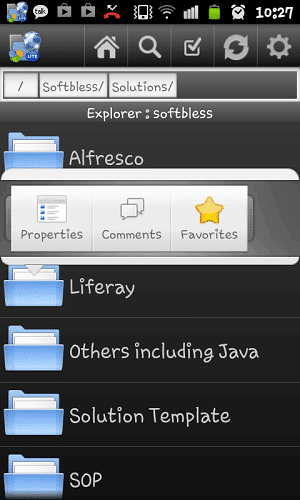
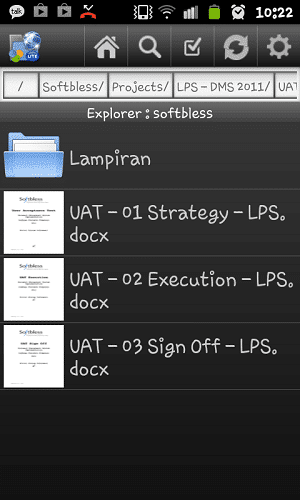
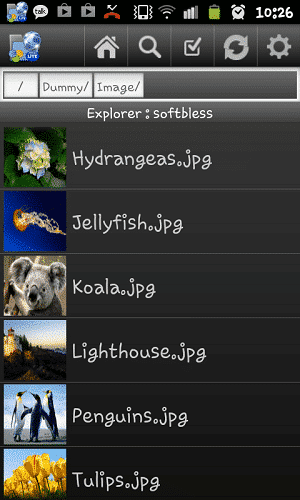
Browse Document. To view the contents of the Alfresco repository, click the button CMIS Explorer
It will appear in the Alfresco folder structure
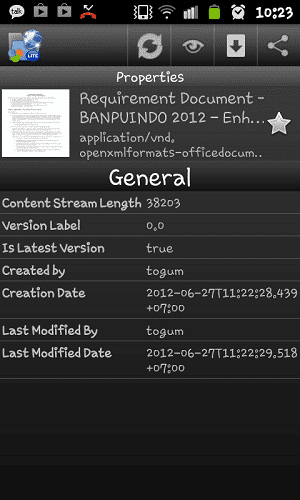
View Properties. Click on the document if you want to see the metadata
This is an example of metadata from docx files
This is an example of metadata from image files
Actions
With this application, you can view thumbnails of documents
Ini adalah contoh thumbnail dari file docx
This is an example of thumbnails from image files
How to install and run the Android emulator?:
1. Download adt-bundle-windows-x86_64
2. Unzip the downloaded
3. Open the folder adt-bundle-windows-x86_64 \ adt-bundle-windows \ eclipse
4. Double click Eclipse.exe
5. Browse repository workspace, and then click OK
6. After Java - ADT open, click the Windows Menu - Android Virtual Device Manager
7. Click New
Fill in the form according to the type of device you want to run:
AVD Name : Nexus
Device : 5.1" WVGA (480 x 800: mdpi)
Target : Android 4.2 - API Level 17
RAM : 512
VM Heap : 16
Internal Storage : 200 MiB
SD Card : 1 GiB
8. Then click OK
9. Select Nexus and click Start
10. Emulators are loaded
----------------------------------------------------------
Install applications ACC - ALF Mobile

The first time you open the application ACC - ALF Mobile then you will see Add content repository.
Click Yes.
Select the type of server, select the Alfresco server by clicking the button Alfresco Server
Details:
Credentials
Hostname: 192.168.1.15
User: togum
Password: ******
Advanced Configuration
HTTPS: not checked
Port: 80
URL: /alfresco/service/cmis
Repository
Repository Name: Type anything - it's a personnal label/id for your server inside the application. Ex: softbless. "If it is not filled then be validated because of the content of the repository name to empty".
Workspace: Main Repository
Credentials
Advanced Configuration
Repository
Browse Document. To view the contents of the Alfresco repository, click the button CMIS Explorer
It will appear in the Alfresco folder structure
View Properties. Click on the document if you want to see the metadata
This is an example of metadata from docx files
This is an example of metadata from image files
Actions
With this application, you can view thumbnails of documents
Ini adalah contoh thumbnail dari file docx
This is an example of thumbnails from image files
How to install and run the Android emulator?:
1. Download adt-bundle-windows-x86_64
2. Unzip the downloaded
3. Open the folder adt-bundle-windows-x86_64 \ adt-bundle-windows \ eclipse
4. Double click Eclipse.exe
5. Browse repository workspace, and then click OK
6. After Java - ADT open, click the Windows Menu - Android Virtual Device Manager
7. Click New
Fill in the form according to the type of device you want to run:
AVD Name : Nexus
Device : 5.1" WVGA (480 x 800: mdpi)
Target : Android 4.2 - API Level 17
RAM : 512
VM Heap : 16
Internal Storage : 200 MiB
SD Card : 1 GiB
8. Then click OK
9. Select Nexus and click Start
10. Emulators are loaded
11
Dec
Alfresco 4.2.b Installation Tutorial on Linux
Alfresco 4.2.b Installation Tutorial on Linux
For alfresco installation process on Linux and Windows are the same.
Here's a screenshot of the installation process on Linux Alfresco 4.2 b:
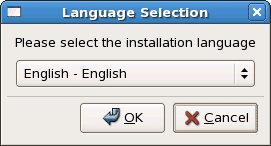
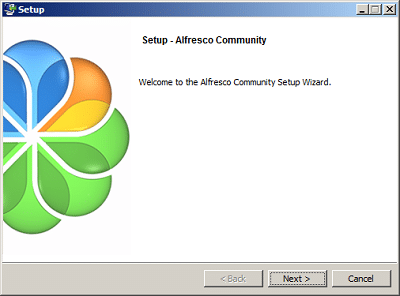
1. Language selection
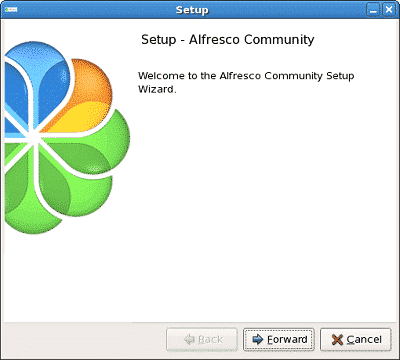
2. Alfresco Community Setup
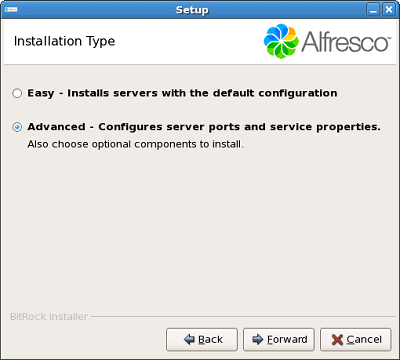
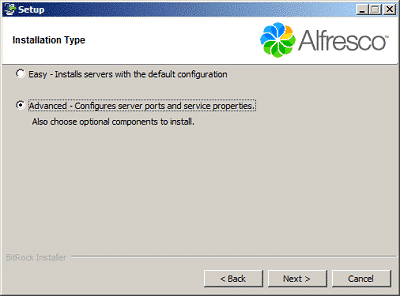
3. Installation type
Chose Advance-Configures server ports and services properties
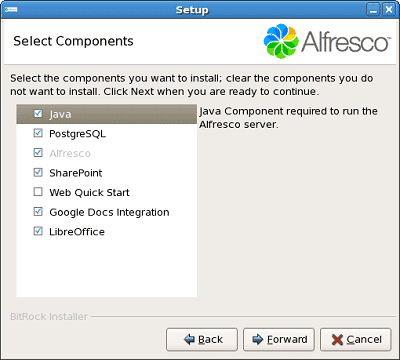
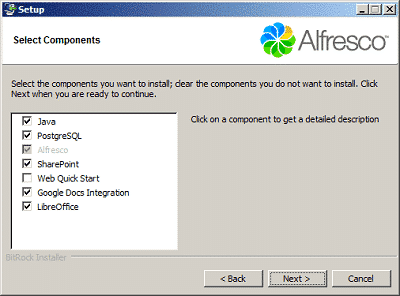
4. Select the application
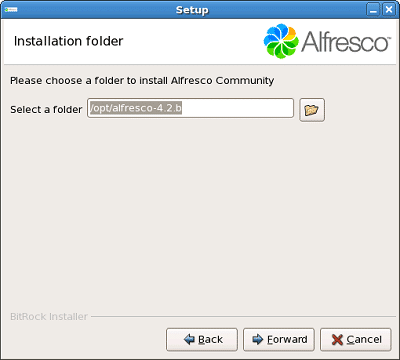
5. Select where to save the patch to be installed alfresco folder
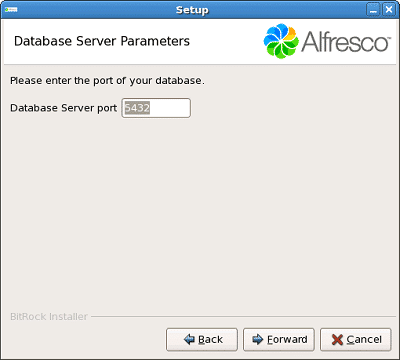
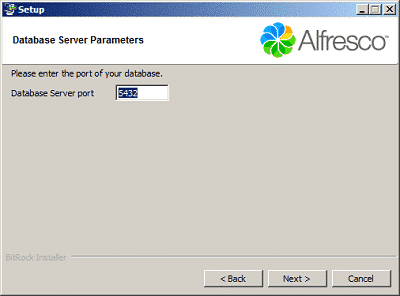
6. Enter port for the database server
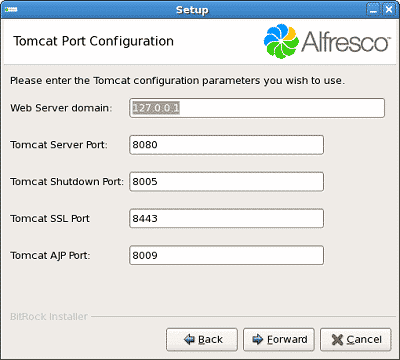
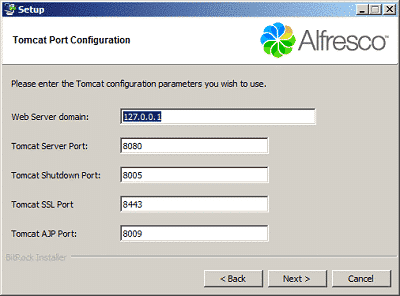
7. Enter the IP address and port for tomcat The example below is the ip address for localhost
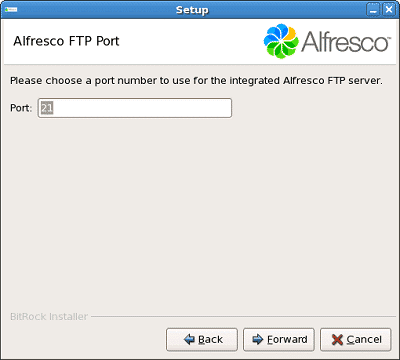
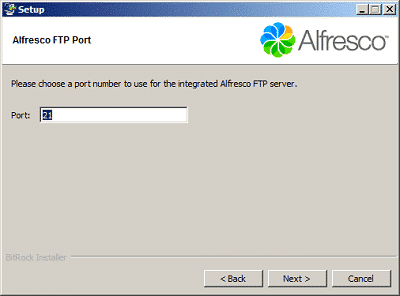
8. Enter port for the FTP server
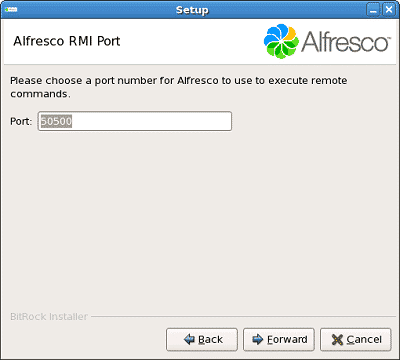
9. Enter port for remote commands
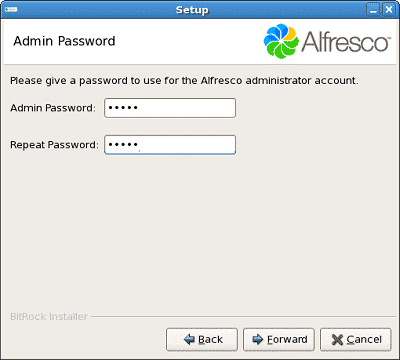
10. Enter the password for the application Alfresco
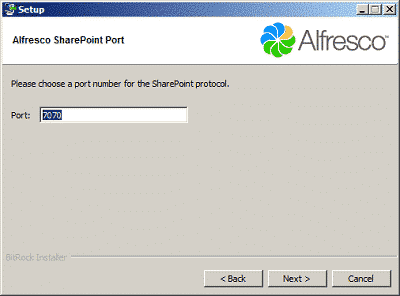
11. Enter port for SharePoint
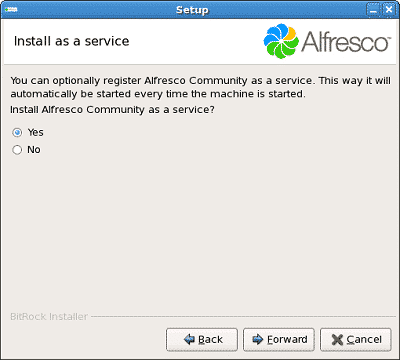
12 Install alfresco as a service?
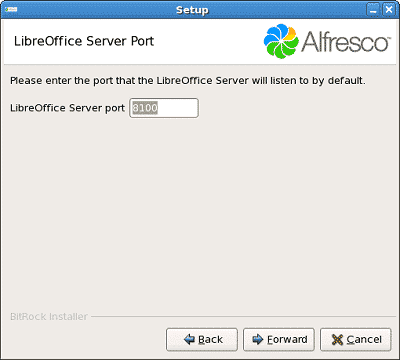
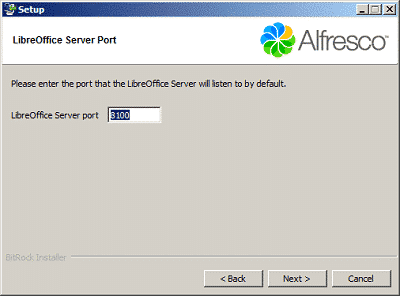
13. Enter port for LibreOffice
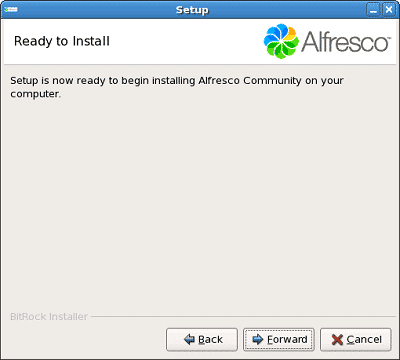
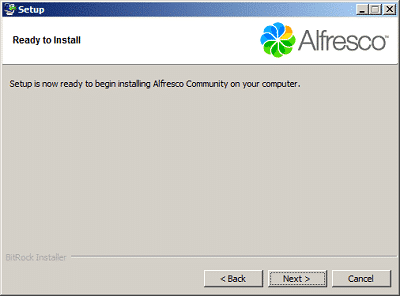
14. Preparation for installation of Alfresco
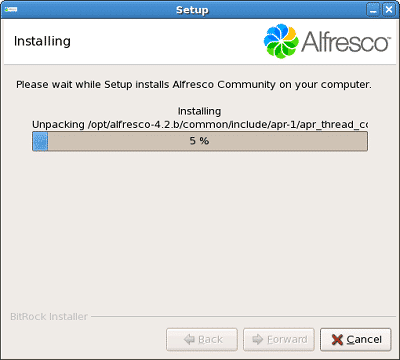
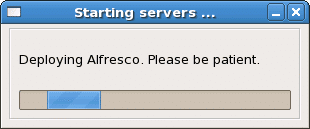
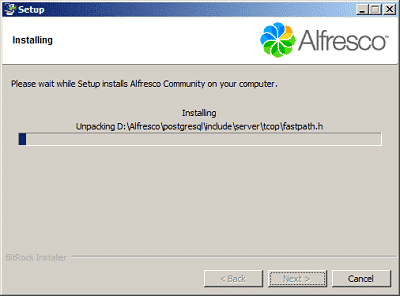
15. Alfresco installation process
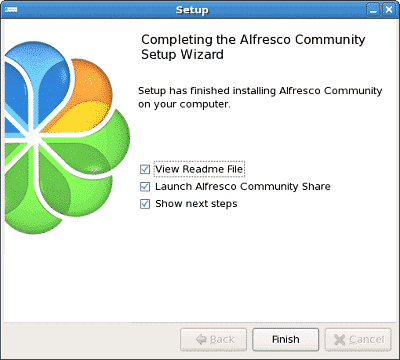
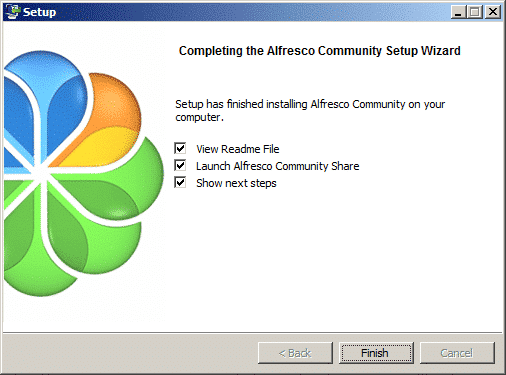
16. Alfresco installation has been completed
17. Starting servers
18. After that it leads directly to the browser application
Enter the username and password you created at installation stage Alfresco
Username is admin
19. Alfresco display in the browser
For alfresco installation process on Linux and Windows are the same.
Here's a screenshot of the installation process on Linux Alfresco 4.2 b:
1. Language selection
2. Alfresco Community Setup
3. Installation type
Chose Advance-Configures server ports and services properties
4. Select the application
5. Select where to save the patch to be installed alfresco folder
6. Enter port for the database server
7. Enter the IP address and port for tomcat The example below is the ip address for localhost
8. Enter port for the FTP server
9. Enter port for remote commands
10. Enter the password for the application Alfresco
11. Enter port for SharePoint

12 Install alfresco as a service?
13. Enter port for LibreOffice
14. Preparation for installation of Alfresco
15. Alfresco installation process
16. Alfresco installation has been completed
17. Starting servers
18. After that it leads directly to the browser application
Enter the username and password you created at installation stage Alfresco
Username is admin

19. Alfresco display in the browser

10
Dec
Alfresco 4.2.b Installation Tutorial on Windows
Alfresco 4.2.b Installation Tutorial on Windows
For alfresco installation process on Linux and Windows are the same.
Here's a screenshot of the installation process on Windows Alfresco 4.2 b:
1. Language selection
2. Alfresco Community Setup
3. Installation type Chose Advance-Configures server ports and services properties
4. Select the application
5. Select where to save the patch to be installed alfresco folder
6. Enter port for the database server
7. Enter the IP address and port for tomcat The example below is the ip address for localhost
8. Enter port for the FTP server
9. Enter port for remote commands
10. Enter the password for the application Alfresco
11. Enter port for SharePoint
12. Enter port for LibreOffice
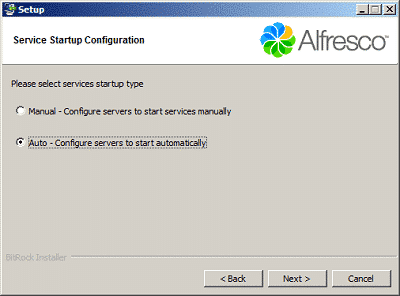
13. Select the type of configuration to the startup tomcat and database
14. Preparation for installation of Alfresco
15. Alfresco installation process
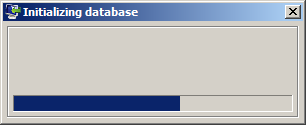
16. Database installation process
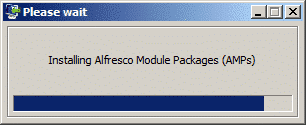
17. Alfresco module Installation Process
18. Alfresco installation has been completed
19. After that it leads directly to the browser application
Enter the username and password you created at installation stage Alfresco
Username is admin
Password according to the time of the installation alfresco
Then click login
20. Alfresco display in the browser
For alfresco installation process on Linux and Windows are the same.
Here's a screenshot of the installation process on Windows Alfresco 4.2 b:
1. Language selection

2. Alfresco Community Setup
3. Installation type Chose Advance-Configures server ports and services properties
4. Select the application
5. Select where to save the patch to be installed alfresco folder
6. Enter port for the database server
7. Enter the IP address and port for tomcat The example below is the ip address for localhost
8. Enter port for the FTP server
9. Enter port for remote commands

10. Enter the password for the application Alfresco

11. Enter port for SharePoint
12. Enter port for LibreOffice
13. Select the type of configuration to the startup tomcat and database
14. Preparation for installation of Alfresco
15. Alfresco installation process
16. Database installation process
17. Alfresco module Installation Process
18. Alfresco installation has been completed
19. After that it leads directly to the browser application
Enter the username and password you created at installation stage Alfresco
Username is admin
Password according to the time of the installation alfresco
Then click login
20. Alfresco display in the browser
28
Nov
Alfresco Meetup November 2012, Jakarta - Indonesia
This November will be held back Alfresco Meetup, Jakarta, Indonesia, which had previously been held regularly every month since June 2011.
The meetup will be held on 29 November 2012 with the topic of discussion;
- Recap Alfresco Developer Conference that was held in early November
- Adaptive Case Management Toolbox
Venue:
Elite Club Meeting Room, Epicentrum,
Epicentrum complex, Rasuna Said Kav C22
Jakarta, Indonesia
(locations where it fits in the back of the Festival Market)