17 Nov

Instalasi Alfresco EA + MySQL pada Windows

Pastikan Anda telah memiliki installer dari Alfresco Untuk proses instalasi, Berikut screen shot proses instalasi Alfresco EA 201609 pada Windows :
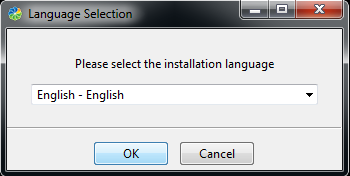
1. Pemilihan bahasa. Silahkan pilih Bahasa Inggris yaitu “English – English” lalu klik tombol “OK”
Pilih Bahasa
 
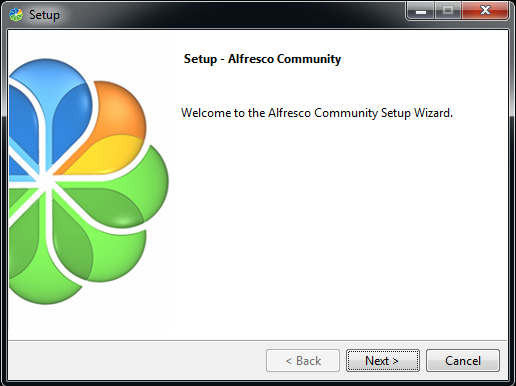
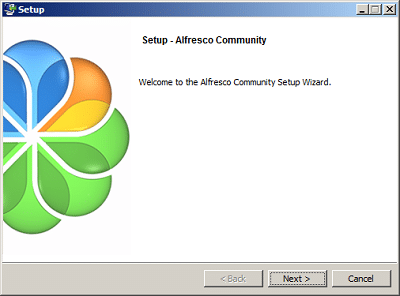
2. Setup Alfresco community, Klik tombol “Next”
Setup Alfresco Community
 
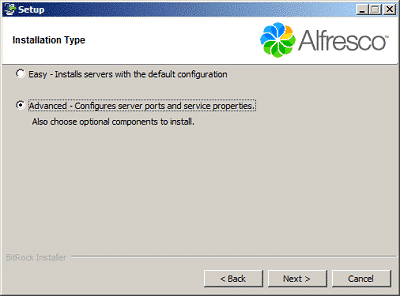
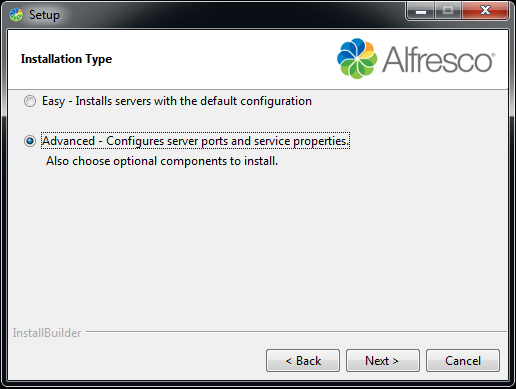
3. Untuk tipe Instalasi, Pilih “Advance-Configures server ports and services properties” lalu klik “Next”
Installation Type
 
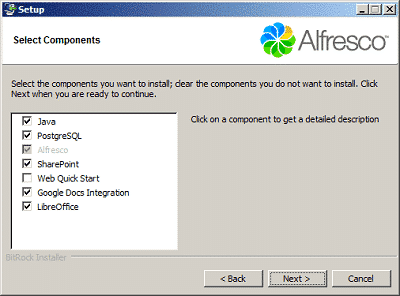
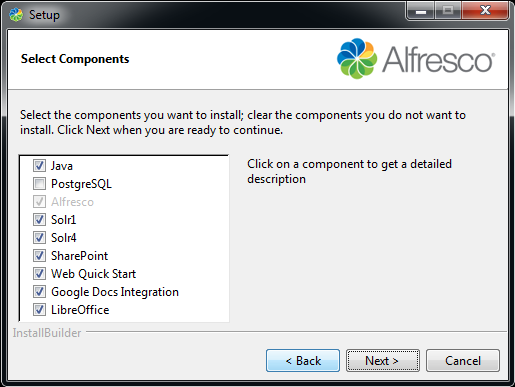
4. Pilih Aplikasi yang diinginkan, mungkin anda dapat mengikuti gambar di bawah :
Select Components
 
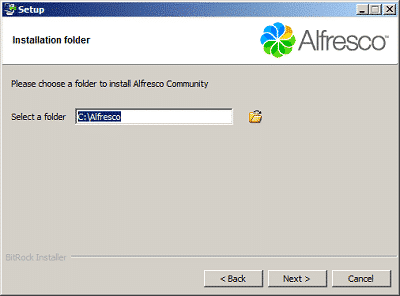
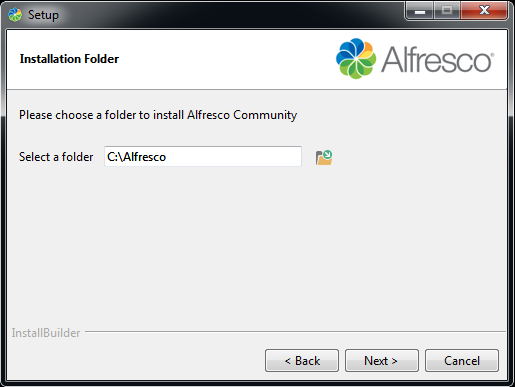
5. Pilih di path mana untuk menyimpan folder alfresco yang diinstal. Anda dapat menyimpannya di C:\Alfresco
Installation Folder
 
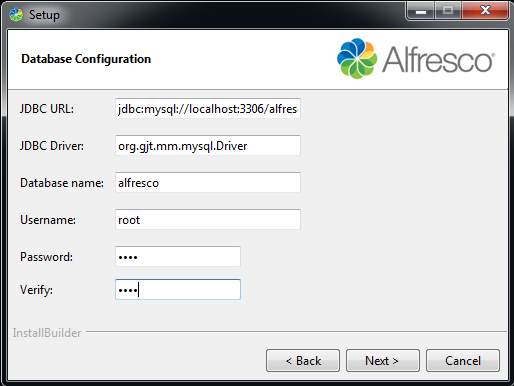
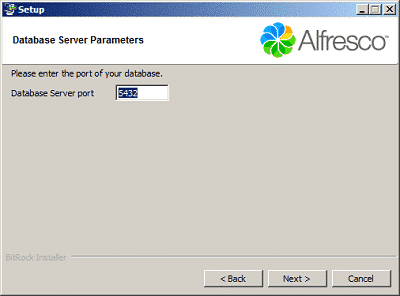
6. Masukan konfigurasi database seperti gambar di bawah ini, setelah itu klik “Next”
Database Configuration
 
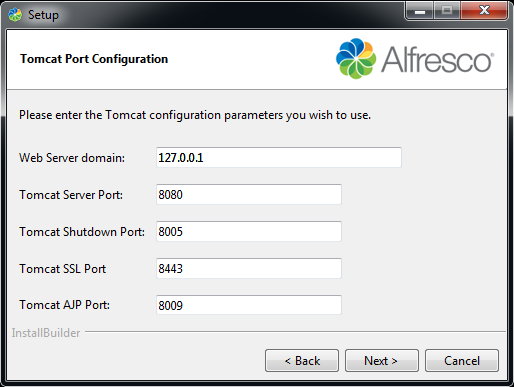
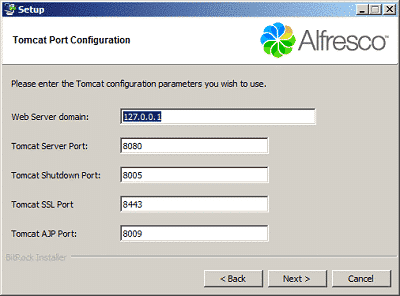
7. Untuk konfigurasi tomcat, masukan ip address dan port untuk tomcat. Contoh di bawah adalah ip address untuk localhost :
Tomcat Port Configuration
 
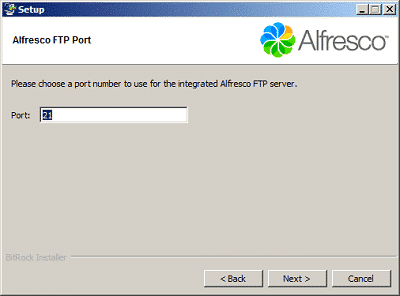
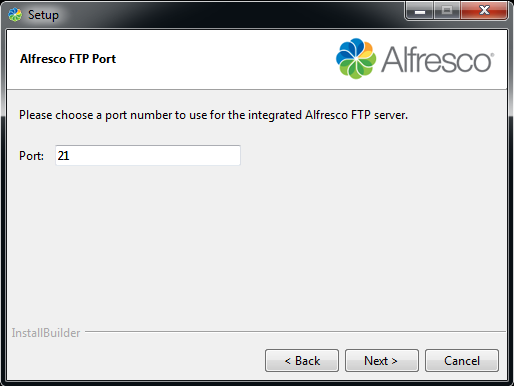
8. Masukkan port untuk FTP Server : 21
Alfresco FTP Port
 
9. Masukan port untuk remote command yang berisi 50500 seperti gambar di bawah ini :
Alfresco RMI Port
 
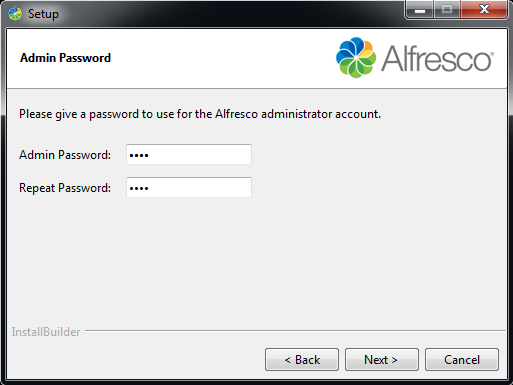
10. Masukan password Admin untuk aplikasi Alfresco-nya
Admin Password
 
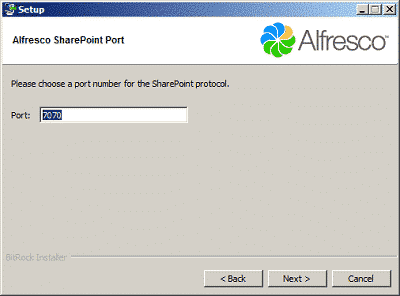
11. Masukan port untuk SharePoint, Port : 7070
Alfresco SharePoint Port
 
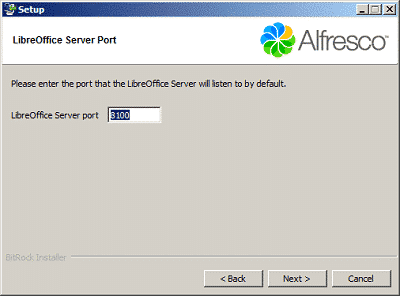
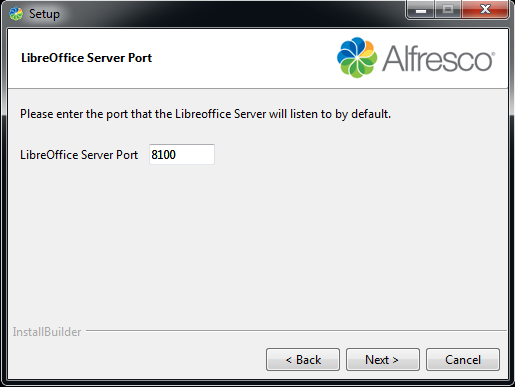
12. Masukan port untuk Libreoffice yaitu 8100
LibreOffice Server Port
 
 
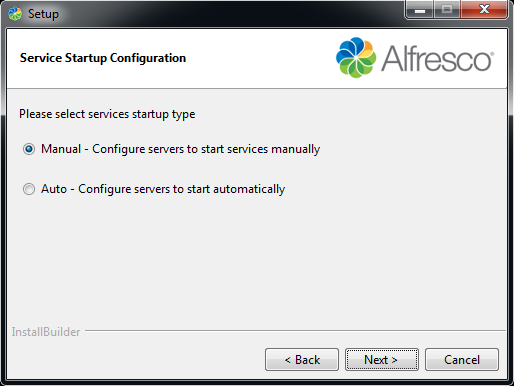
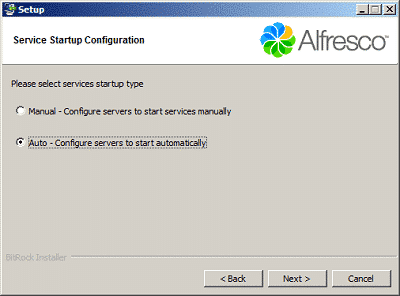
13. Pilih tipe konfigurasi untuk startup tomcat dan databasenya, Anda dapat memilih Auto jika ingin memulai secara otomatis. Atau Manual jika ingin secara manual
Service Startuo Configuration
 
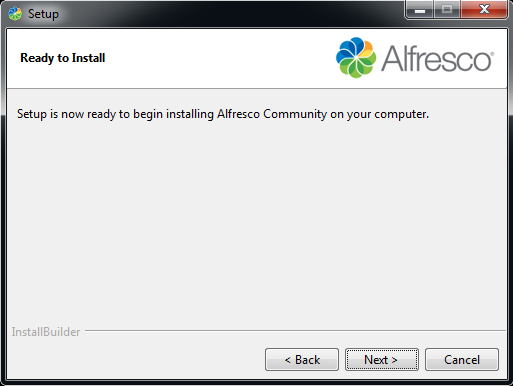
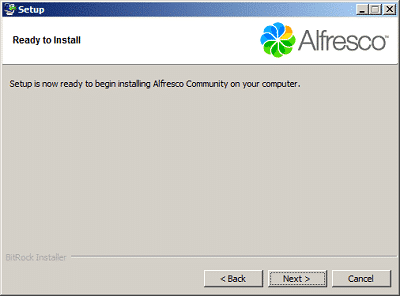
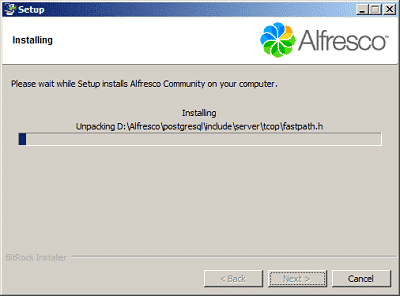
14. Persiapan untuk instalasi Alfresco, Silahkan klik “Next” untuk melanjutkannya.
Persiapan Instalasi
 
Ready To Install
 
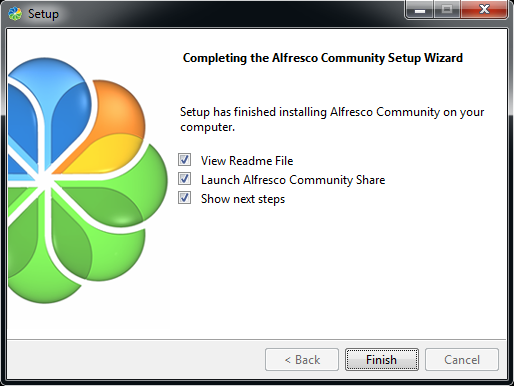
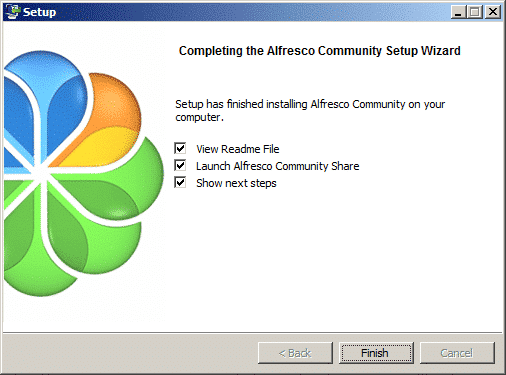
15. Setelah instalasi selesai, klik tombol “Finish”
Completing Installation
 
16. Copy file mysql-connector-java-5.1.18-bin.jar ke dalam folder “C:alfresco\tomcat\lib”
 
Alfresco versi 5.0 tidak menggunakan MySQL lagi dalam installer bundled-nya, tetapi telah memilih PostgreSQL sebagai DBMS-nya.
Untuk menjalankan service Alfresco, click : Start – All Programs – Alfresco Community - Alfresco Community Service - Start Alfresco Community service.
Atau dapat dilakukan melalui Run - services.msc. Akan terdapat sebuah service Alfresco. Klik kanan, start | stop | restart.
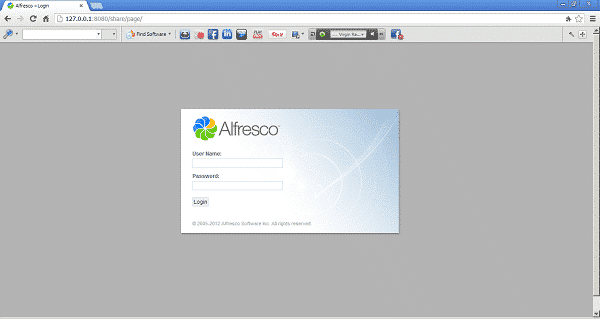
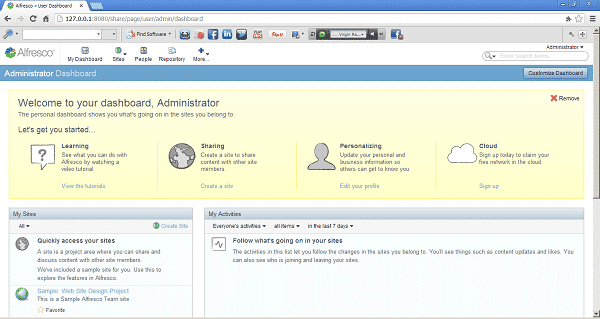
Dengan menjalankan service Alfresco, maka kita dapat mengakses Alfresco web client dari browser dengan alamat: http://ipserver:8080/share
 
Form Login Alfresco
 
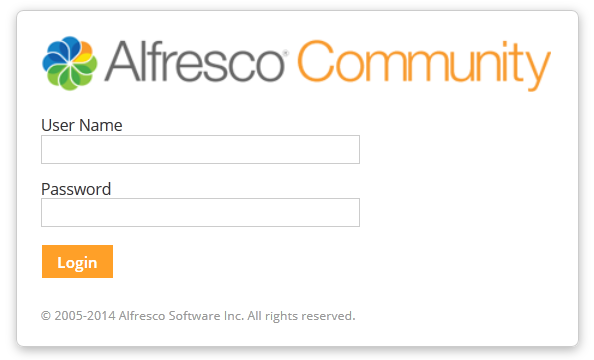
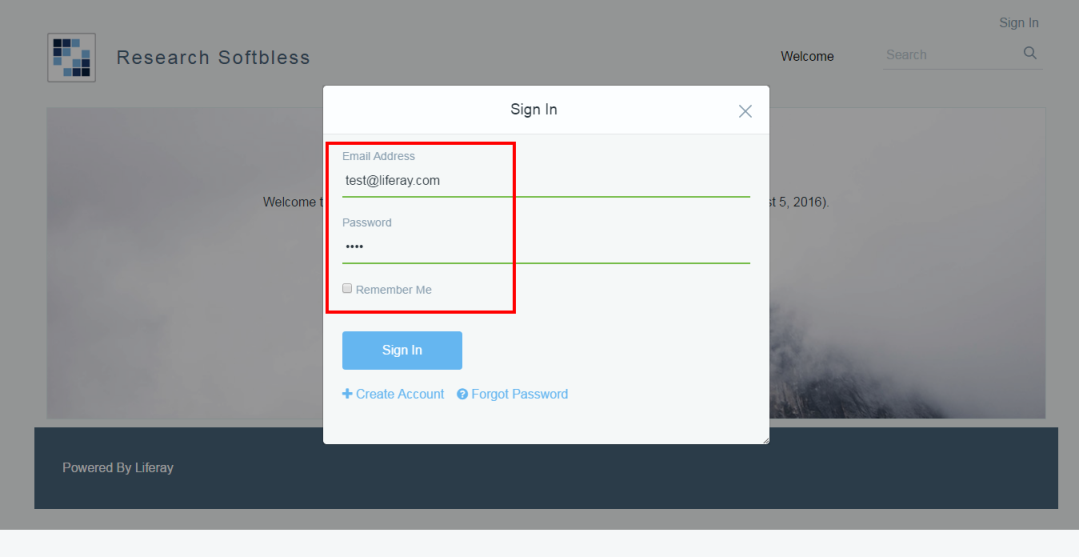
Pada form login, masukkan username Admin serta password yang sebelumnya sudah di-setting pada saat instalasi Alfresco.
17 Nov

Instalasi Liferay 7 (DXP) + MySQL pada Windows

 
Instalasi Liferay pada sistem operasi Windows hampir sama dengan instalasi pada Linux, perbedaannya hanya pada path instalasi. Berikut langkah-langkah instalasi Liferay pada Windows :
1. Ekstrak Liferay kemudian copy ke folder C:\. Sehingga akan terdapat struktur folder seperti di bawah ini :
C:\liferay-ce-portal-7.0-ga3
2. Install JAVA JDK 1.8, lalu setting JAVA_HOME, CATALINA_HOME dan path nya
Konfigurasi Java Home
 
Konfigurasi Catalina Home
 
Konfigurasi Path
Tambahkan setting  path seperti ini:
 
%JAVA_HOME%\bin;%CATALINA_HOME%\bin
 
3. Lakukan instalasi MySQL 5.7  server pada Windows
4. Buat schema database baru dengan nama lportal :
create database lportal character set utf8;
Create Database MySQL
5. Jalankan Liferay dengan cara klik ganda file startup.bat pada:
C:\liferay-ce-portal-7.0-ga3\tomcat-8.0.32\bin\startup.bat
Startup Liferay Tomcat
6. Tomcat akan berjalan, setelah itu liferay akan dapat di akses melalui browser dan akan muncul “Basic Configuration” seperti gambar di bawah ini :
Basic Configuration Liferay
7. Masukan portal name nya dengan nama portal
8. Isi formulir first name, last name, dan email untuk administrator
9. Lihat bagian Database, ubah setting-an database dengan mengklik “Change”
10. Isi data pada setiap kolom, untuk type database sesuai dengan database yang digunakan yaitu, MySQL. Lalu masukkan username dan password.
CATATAN :
Pada JDBC URL : liferay7 adalah nama database yang akan dipakai untuk Liferay
11. Jika sudah sesuai klik tombol “Finish Configuration”
12. Akan muncul gambar seperti dibawah ini, klik Go to My portal
Finish Configuration Liferay
13. Restart service liferay dengan cara klik shutdown.bat pada “C:\liferay-ce-portal-7.0-ga3\tomcat-8.0.32\bin\shutdown.bat” dan kemudian klik startup.bat pada “C:\liferay-ce-portal-7.0-ga3\tomcat-8.0.32\bin\startup.bat”
14. Liferay sudah terinstal, Akses Liferay melalui web browser http://ipserver:8080
Username : test@liferay.com
Password : test
Login Portal Liferay
25 Mar

Liferay 6.2 Installation Tutorial on Windows

In a previous article, we have discussed about tutorial of alfresco installation. Now,  Softbless Solutions will share more information about Liferay installation. And this article will discuss about tutorial of Liferay installation on windows operating systems:

Because Liferay is a JAVA-based engine, then we need JDK version 5 and above. In addition to the JDK we also need a database that will be used for Liferay. Liferay installation for this time, Softbless Solutions will use MySQL as the database.

The following are the step by step Liferay installation on windows by using the MySQL database:

  1. Download liferay 6.2 CE at www.liferay.com
  2. Extract liferay 6.2 CE that has been downloaded then copied to the folder C: \. So that there will be a folder structure like this:
    C:\liferay-portal-6.2-ce-ga2
  3. Install the JDK, then setting JRE_HOME, and CATALINA_HOME

  1. Install MySQL server on Windows
  2. Create a new database schema with the name “lportal” :
    create database lportal character set utf8;

  1. Run Liferay by double clicking on the startup.bat file :
    C:\liferay-portal-6.2-ce-ga2\tomcat-7.0.42\bin\startup.bat

  1. Tomcat will running, after that the Liferay can be accessible through a browser and as a prefix will appear "Basic Configuration" as shown below :

  1. Put the portal its name matches the name of the portal to be made. Example : Softbless
  2. Fill in the form of first name, last name, and email to the administrator
  3. Navigate to the Database setting, change the settings of the database by clicking "Change"

  1. Fill in every field for database setting. for the type of database according to the database being used, namely, MySQL. Then enter your username and password.


CATATAN :

Pada JDBC URL : lportal is the name of the database that will be used for Liferay

  1. Click the "Finish Configuration" if you have fill in the fields
  2. The success message will be appear, and then click Go to My Portal

  1. After that, the Agreement for term of user will be show like this picture below :

  1. Click "I Agree"

  1. Fill in the form for Password Reminder and click "Save"

  1. Liferay already installed, you can access Liferay via a web browser http: // ipserver: 8080
    Username : test@liferay.com
    Password : test

As implementation services provider for Liferay in Indonesia. Softbless Solutions has extensive experience in implementing, configuring and optimizing support for Liferay as an enterprise portal solution that is also in accordance with the vision of Softbless Solutions to become the leading provider of open source solutions and provide clients the most valuable service.

25 Mar

Alfresco 5.0 Installation Tutorial on Windows

Tutorial for installation of Alfresco Community in this time will using the latest version, Alfresco 5.0. Make sure you have the installer of Alfresco 5.0 and The following below is step by step installation of Alfresco 5.0 on Windows :

  1. Language Selection. Please select "English - English" and then click "OK"

  1. Setup Alfresco Community, click "Next" button

  1. For the Installation Type, select "Advance-configures the server ports and services Properties" and click "Next"

  1. Select the components you want to install, you may be able to follow the image below :

  1. Select the folder path where to store the installed alfresco. You can save it in C: \ Alfresco

  1. Input the database configuration as shown below, then click "Next"

  1. For Tomcat Port configuration, enter the IP address and port for tomcat. You can see the example below :

  1. Enter the port for FTP Server: 21

  1. Input port for the remote command which contains 50500 as shown below :

  1. Enter the admin password for this application

  1. Input port for SharePoint, Port: 7070

  1. Input port for OpenOffice is 8100

  1. Select the type of configuration to the startup tomcat and the database, you can choose Auto if you want to start automatically. Or Manual if you want to start services manually

  1. Preparation for the installation of Alfresco, please click "Next" to continue.

  1. After the installation is complete, click "Finish"

Alfresco version 5.0 does not use the bundled MySQL again in the installer, but have chosen PostgreSQL as its DBMS. To run the service Alfresco, click: Start - All Programs – Alfresco Community - Alfresco Community Service - Start Alfresco Community service. Or can be run the service through the Run - services.msc. There will be a service Alfresco. Right-click, start | stop | restart. After starting the service of Alfresco, then we can access the Alfresco web client from the browser with the address: http://ipserver: 8080/share

Softbless Solutions telah memiliki banyak pengalaman dan juga resources sebagai penyedia jasa implementasi Alfresco di Indonesia

10 Dec

Alfresco 4.2.b Installation Tutorial on Windows

Alfresco 4.2.b Installation Tutorial on Windows
For alfresco installation process on Linux and Windows are the same.
Here's a screenshot of the installation process on Windows Alfresco 4.2 b:
1. Language selection

Alfresco in Cloud

2. Alfresco Community Setup

Alfresco in Cloud

3. Installation type Chose Advance-Configures server ports and services properties
Alfresco in Cloud

4. Select the application
Alfresco in Cloud

5. Select where to save the patch to be installed alfresco folder
Alfresco in Cloud

6. Enter port for the database server
Alfresco in Cloud

7. Enter the IP address and port for tomcat The example below is the ip address for localhost

Alfresco in Cloud

8. Enter port for the FTP server
Alfresco in Cloud

9. Enter port for remote commands
Alfresco in Cloud

10. Enter the password for the application Alfresco
Alfresco in Cloud

11. Enter port for SharePoint
Alfresco in Cloud

12. Enter port for LibreOffice
Alfresco in Cloud

13. Select the type of configuration to the startup tomcat and database
Alfresco in Cloud

14. Preparation for installation of Alfresco
Alfresco in Cloud

15. Alfresco installation process
Alfresco in Cloud

16. Database installation process
Alfresco in Cloud

17. Alfresco module Installation Process
Alfresco in Cloud

18. Alfresco installation has been completed
Alfresco in Cloud

19. After that it leads directly to the browser application
Enter the username and password you created at installation stage Alfresco
Username is admin
Password according to the time of the installation alfresco
Then click login


Alfresco in Cloud

20. Alfresco display in the browser
Alfresco in Cloud